Do You Have an Old PC? Here’s What You Could Do With It

by

04 April 2022

Gadgets

Old PC

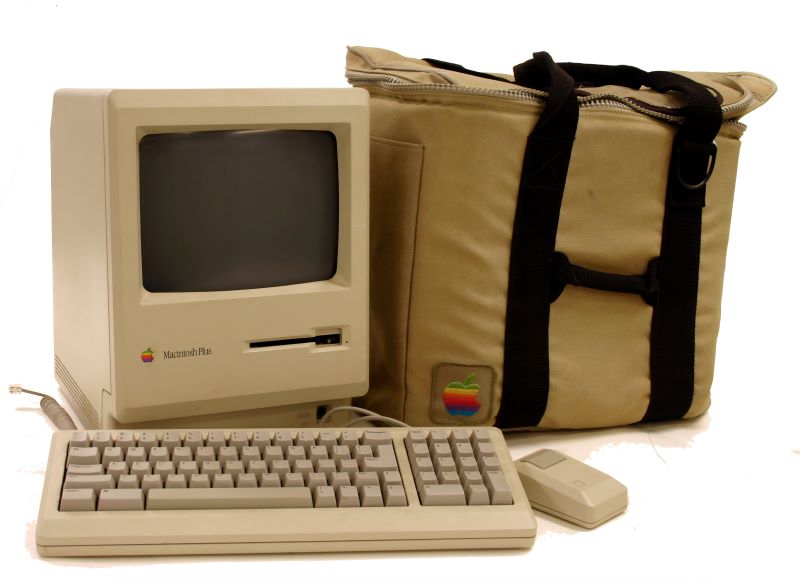
Do you have an old PC that you replaced with a newer model? Whether you’re an individual or a business or an organization, what you do with that old PC is a question that is worth thinking about.

Many people simply decide to throw their old hardware in the trash – but not only is this highly wasteful, but it could also be a wasted opportunity or even a potential security breach. Any IT support professional will tell you how easy it is to retrieve data from an old PC – even a 20-year-old PC found in a landfill would have data on it that you could recover and read.

For more info on what to do with an old PC, whether as an individual or as a business, we spoke to TechQuarters, an IT support provider that operates in North London.

As they have been providing IT Support North London businesses have been relying on for years, they have a lot of experience managing their customer’s PC and hardware. From that experience, they have suggested a number of different things you can do with an old computer, the least of which is to throw it out.

Cleansing an Old PC

Cleansing an Old PC

No matter what you decide to do with a disused PC, the first step should always be to cleanse it of your data. As we mentioned earlier, anyone can restore the data on a hard drive just by using commercial software known as Data.

Forensics software – so if you have anything on your hard drive you wouldn’t want other people to be able to access, such as bank details, passport info, etc. then you should make the effort to wipe the device.

Before you start, you should backup your personal data, by copying it to another storage device – this might be your new computer, or it could be an external hard drive.

Additionally, you should also locate any registration keys and serial numbers for software you have purchased, so that you can transfer it over to your new device – if you don’t do this, you might lose access to the software you have paid money for.

Once you have backed up everything you want to keep, you should wipe the hard drive of your old PC. To begin with, restore the PC to its factory settings.

This will superficially hide your data on the PC’s hard drive, but will not remove it – to do this, you will need to use a Disk-Wiping tool; this software will permanently overwrite your data with random information so that even if someone used Data Forensics, they would only find random data.

What to do with an Old PC?

What to do with an Old PC?

So, once you have backed up all of your data and cleansed the old device of any personal data, what should you do with it? If your first instinct is to throw it away, think again. There are a number of things you can do to get a final return on your investment.

1. Sell for parts

depending on the condition of the PC, you can sell it for the hardware components. This is one way to get some money back from a PC that is too old for anyone to want to use it. The hard drive, CPU, RAM, Graphics Card, and even the Power Supply Unit is potentially valuable parts that others might find useful.

2. Sell as is

If your PC isn’t so old that nobody would want to use it, you could definitely sell it as a second-hand device. Just be sure to wipe your data completely, as someone else will be using it after you.

3. Recycle

If you’re not bothered about making any money back from your old device, and just want to be rid of it, feel free to dispose of it – but try and avoid letting it end up in a landfill. Instead, look for a service that can take the PC from you and recycle the materials correctly. Some computer hardware chains can do this for you.

4. Donate

Perhaps your PC is not that old, and you simply replaced it with a more powerful model. This means your old PC is still completely usable; in which case, you could donate it to an organization. For instance, schools, hospitals, and charitable organizations will all be likely to accept a second-hand PC as a donation.

5. Convert to a Server

Seeing as servers are essentially just PCs that have been optimized for a specific purpose, you could certainly consider turning your old PC into a server. Of course, this won’t be the easiest process in the world but is doable with the right guidance (which you can find online). To start with, a server needs to be running 24/7, so you will need to configure the device to run in a low-power state, make sure it doesn’t shut down at any inconvenient moments, and that it will run properly without any input – because you likely won’t want to have a monitor, keyboard, and mouse connected to it at all times.

Read Also:

Sumona is a persona, having a colossal interest in writing blogs and other jones of calligraphies. In terms of her professional commitments, she carries out sharing sentient blogs by maintaining top-to-toe SEO aspects. Follow more of her contributions in SmartBusinessDaily

View all posts

Leave a Reply

Your email address will not be published. Required fields are marked *

Related

Vape Mods

Do Vape Mods Affect the Quality of Vape?

Vape Mods usually are larger than e-cigarettes with a higher vapor density and production. It is called as such because the device is similar to a typical vape pen, but has an enhanced form and advanced features. Such “modification” come in many types including better battery size, more e-liquid capacity, or a powerful mechanism to sustain good heating and quality vapor release.  Whatever the type of vape mod used, it always has an effect on the overall capacity of the vape. Vape Mod Configuration Have Different Effects on Vapor Taste and Quality: Opting to use a vape mod depends on a lot of things including several years a person has been vaping and the kind of experience they want to have. Though consequentially, it all boils down to personal preferences, and the amount of satisfaction one acquires from the habit. In a traditional sense, people who have been vaping for a long time would want to experiment with something new and venture into other devices.For one, temperature control is affected by the vape mod, which also impacts cloud formation and the level of flavor one acquires from every puff. The sweetness, depth of the essence, and the distinct taste are all affected by the mod and wattage of the device.For example, using a Creamie Blue Raspberry Milk using a Crown tank with a 0.5-ohm coil and at 60w will have the usual vapor taste. But using a different mod with a different setting will change the flavor to a distinct sweetness and less depth. The same goes when using a different vape mod with varying capacities and configurations. The Atomizer and Coil Wick Combination Produce Larger Effects: For people who had years of experience using Vape mods UK, they know that the combination of the atomizer, coil, and the wick produces a more significant effect on the vaping experience. Though the mod is a crucial element of the device, experimenting with it does more than giving a person the idea of which one fits his preferences.People just getting into the habit can quickly move to a Rebuildable Tank Atomizer (RTA) then shift his vaping to a Rebuildable Drip Atomizer (RDA) for the best flavor. There is also a broad spectrum of tanks to choose from and the ability to fully customize a vaping device according to an individual’s liking.Many would also say that quality vaping experience does not come with pre-built atomizers or factory coils, but the ones that are personally customized. This is mainly because quality control is the sole responsibility of the vaper and not from the manufacturer.Customizing a vape also allows a person to tailor his device based on his preferences entirely. This often includes picking his own vape mods the UK, the type of wicks, and wires connecting the base to the battery. While all the components including the tank, coils, and mod have a considerable effect on the flavor and smoke quality, it can be customized based on the user and not just the pre-set configuration of the manufacturer.Read Also:Top 5 Best Types Of Vape Juice Vaping In The Workplace: Legal Considerations Make A Mark: The Vape Brand For Your Lifestyle

READ MOREDetails
PVS 14 Monocular

What You Need to Know about Night Vision Optics?

In the past time, humans hunt the animal for food and fur. But now it is also counted in sports activities in some countries. It is part of their culture. Furthermore, in some regions, people do the hunting of animals during campaigns. Also, in developed countries, several governments allow hunting zones for hunting lovers. With advancements in technology, hunting instruments are developed, and people start hunting at night. About night vision optics for hunting, vision optics make hunting easy at night by the use of monocular.Here, we will discuss a monocular named PVS 14 Monocular. Firstly, this was the choice of armed forces for night operations, but now it is also available for the public only for hunting at night. This is available on the internet and manufactured by many companies.  To know about pvs 14 Monocular, let us proceed through its details. What is PVS 14 Monocular? it is a night vision monocular designed for the most demanding night applications like hunting and night army actions for strikes. It is light in weight, rugged, and versatile device. This allows users to see at night through one eye while viewing their surroundings or targets. Another positive aspect of this monocular, its adaptability to use on the helmet and the weapon. Details About night vision optics for hunting It is initially designed for the united states military that why its quality is high in optics. Further, its application is the same for the hunters to see the animals in the night of woods without making any noise. Its shape and size are listed below.Dimensions of the products: its size is 4.5 X 2.2 X 2 inches Weight: It weighs up to one pound. Headgear specification: multipurpose unit, Handhold Monocular, Hands-free goggle optional helmet mount. IR System: Total darkness IR System Magnification: Yes, up to 2X magnify Color option: Yes, Multi Colors Field of view: 40 degree Diopter Adjustment: -6 to +2 diopters Objective Lens: 26 mm, f/1.2 Focus Range: 9.8” to infinity Power Source: 2 AA size batteries are required Night observing distance: seen clearly up to 100 meters at night Eyepieces Size: eye pupil diameter 14mm Waterproof: Yes, it is waterproof Display screen: LCD screenFurther, its package includes one protective film, one mount, one blinder, a storage bag, and a user manual. What did hunters think of PVS 14 monocular? On exploring the internet for the mentioned monocular, we found mixed thoughts of hunters. A few hunters are satisfied with this product, but it has more negative reviews on the internet. The opposing view has their opinions like the rectangular screen is not appropriately mounted when mounted on the helmet, and one of them is saying that its focus is not good when it magnifies to 2X. Furthermore, many other negative reviews are available on the internet, and buyers who buy this in the past not suggested this.Read Also:Hunting Tips For Beginners

READ MOREDetails
Soldering Iron

How to Use a Soldering Iron

Of all techniques and methods used to join surfaces, metal sheets, Iron, and other objects together, soldering is highly preferred because it does not cause any type of damage to the items being joined together. This is because the solder used to stick them together has a lower melting point than most metals and it offers durable yet reversible bonds between the items. In addition to that, although there are a few key differences between the two types of soldering gear used, they share a similar trait and they’re both easily operable, which we will discover more in this article What Is Soldering? There are several types of soldering using different filler metals called solder, but, they all use the same concept which is heating a filler metal between two items so that it melts and fills the seam between the two items.Soldering is done using either individually bought soldering gear, which allows you to choose the type of tool that is most suitable for the project you are planning to work on, or a soldering station which usually is a standard combination of a soldering iron and a power supply. Soldering Iron  In order to learn how to use a soldering iron, one must first know its basic parts and the science behind its mode of operation.It is simply a tool that connects to a power supply, it consists of a handle that doesn’t conduct heat and a tip that heats up very quickly to high temperatures so it can melt the solder, it also cools down fast. To Be More Specific, The Main Parts Of Soldering Iron Are:Soldering tip: All soldering irons contain iron tips which are the only part that heats up; it doesn’t ooze out the solder as most people think, it simply heats the metals being joined so that when the solder is applied, it melts, but more often than not, the solder would stick on the tip. Luckily, most tips are interchangeable so, you can replace your tip in case of damage or in case you need a specialized tip to suit your uses; bear in mind that tips vary in size and shape, thus, they vary in their uses as well. Wand: The wand is the handheld part of the iron that the tip is attached to. It can be made from a large number of materials that poorly conduct heat or isolate it completely so as to prevent heat from the tip from transferring to the part where the wand makes contact with the skin. Inside the wand, there are wires and metal contacts that conduct and convert the electricity from the power outlet to heat. The contradicting functions of a wand are the reason why most people prefer to buy high-quality wands from renowned brands.Of course, there are other extras and accessories like brass sponges, cradles, and tip tinner which can be purchased individually or found in soldering stations which is actually one of the advantages of soldering stations; but, the two main parts will always remain the tip and the wand. Step 1: Safety First of all, before using a soldering iron, you must be familiar with standard safety precautions since the iron tends to get really hot; not to mention the fact that solder is literally molten metal. So, it would be smart of you to wear protective gear such as; safety goggles and protective gloves, because your fingers are most likely to come into contact with the tip during the first few times. You also should keep in mind to tie your hair and avoid wearing loose-fitting clothes. Moreover, it is preferable to work in a well-ventilated area since some types of solder contain lead which produces toxic fumes, it is also important to thoroughly clean your hands after handling lead-based material. Step 2: Preparing The Tip The tip should be regularly cleaned of any old solder because when old solder solidifies, it turns into a heat isolator due to oxidization resulting in a totally inefficient and highly wasteful soldering process. Not only that but also, slow heating means that you will have to hold the iron to the items being joined for a longer time; it would be highly inconvenient for you and very damaging for sensitive objects like PCBs.So, when the iron is fully heated, softly drag the tip against a sponge to remove old solder. You want to aim for a shiny tip. After cleaning the tip, you should “tin” the tip; to make it last longer and conduct heat better through newfound layers of solder. Same as above, on a fully heated iron, apply a little piece of solder and lightly coat the tip with tinner; then, immediately start soldering while cleaning and tinning the tip between every couple of joints for maximum conductivity and efficiency. Step 3: Actual soldering With your dominant hand holding the iron and the other holding a piece of solder, touch the area where the object comes into contact with the solder and hold it there for about a second then slide the solder underneath the tip while pushing the solder rod further according to how much solder you need.Then, make sure to pull back the solder first while holding the tip in position until all the solder melts; it usually takes about five seconds or less. Solder cools down fast so, you will not need to blow on the joint since it will only lead to a weak joint which can be identified by its oxidized, unclear, and grainy appearance. What you want to get is a smooth connection, not a lump. Finishing touches : After you’ve had enough soldering for the day, clean and in the tip again before you put it into storage, it helps increase its lifespan.As you may have noticed, soldering is not that hard of a task, it only requires soldering gear, steady hands, and concentration. So, go ahead, start soldering, and don’t be afraid to get creative.Read Also:Is Polyester Stretchy? – Its Materials & Properties [Detailed Explanation] Top 6 Different Types Of Scarves Names And Its Benefits How to Thicken Chili – Tried and Tested

READ MOREDetails