How To Empty Trash On Android?

by

03 July 2021

Mobile

How to empty trash on android

Most of the owners of Android have complaints regarding the Trash Folder on Android. If you have been using Android for an extended period, you must have dealt with the storage issues on your handset. 

Unlike Mac or Windows, there is not any specific location that collects the trash. Hence, you need to be one step ahead while cleaning clutters on your phone. 

Haven you not looked for a perfect solution to it everywhere? You might have because you are here, which means the issue is persisting. But today, you will not be disappointed anymore. In this article, we have noted small details regarding how to empty trash on android

Do Android Devices Have A Trash/Recycle Bin?

Do Android Devices Have A Trash/Recycle Bin?

The most straightforward answer to this question is; NO, Trash Folder or Recycle Bin are not present on Android Device. That’s great because this concept has to be clear beforehand. So, I hope you can sense that in this respect, the frameworks of Mac and Windows are completely different.

It is owing to the limited storage that most smartphones have. The storage can range from 8 GB – 256 GB.  Thus, it is not a viable idea to keep a folder for collecting trash from everywhere. 

However, specific applications, such as Photos, carry a particular folder called Trash for lately deleted items. Thus, if you would like to eliminate junk files, you have to open each app and remove unwanted data.

Below, we have presented some feasible methods to kick the junk files out from your Android device. 

How To Empty Trash On Android And Optimize Its Performance?

How To Empty Trash On Android And Optimize Its Performance?

Optimizing your handset is crucial to improve its overall performance. When you purchase a new Android phone, do you expect that this can become slow like a sloth after few months? Not only you but also nobody does that.

Needless to say that, trash memory in different applications on Android could be highly frustrating. It can even be your nightmare as well. To boost your device, you need to delete the unnecessary files, clean the cache of apps and empty the trash folder.

Although as there no such thing called ‘Bin’or ‘Trash’ in Android, you should follow the steps below diligently to understand how to empty trash on android.

1. Clear The Cached Data

The cache is a go-between data that your device saves to optimize your user experience. Nevertheless, it occupies your phone’s memory, and this, in turn, prohibits you from downloading or saving other items. 

Here is how you can delete cached data from an Android Device:

  • Go to the Storage tab under the Settings and click Cached data.
  • You will visualize options to delete the cache.
  • Select the ones you want to delete and follow the screen options. 

Or if you want to delete the cache of individual apps, you can do it in this way:

  • Access the Settings
  • Hit the Apps
  • Choose the App whose cache you wish to remove
  • Click the Clear Cache Button, and there you go.

2. Remove The Downloaded Files

Remove The Downloaded Files

This is 2nd most crucial step, which many of us forget to execute correctly. Can you remember the last time when you deleted all your downloaded files? You can’t because you have not done it over a long time. 

Let me be obvious over here. Even if you do not use the downloaded files, they can still hold space in your Android’s internal memory. To clean up the storage, you require omitting them permanently from your device. 

Simply navigate to the Downloads Folder from File Manager. Then choose the files you do not need to access anymore and hit the Delete option. I bet you will be awestruck to see the amount of storage it would free up. 

3. Uninstall The Unused Or Rarely Used Apps

It is another significant step in the roadway of ‘how to empty trash on android’. All of us have those apps on our phones that we have never used or use occasionally. Analyze whether you need them all. If not, you can clear plenty of memory by uninstalling the redundant ones. 

To do this, note the steps below:

  • Navigate to the Settings
  • Tap Apps
  • Select the application that you no longer require
  • Click on the Uninstall button, and BOOM, the memory would get boosted.

4. Get Third-Party Applications

Get Third-Party Applications

Do you want to master the methodology of how to empty trash on android? Several applications are that can you can make use of to delete the junk from your device. Why don’t you try these? Let me explain to you the details before that.

We recommend the most simple app to delete junk files from Android. They can access the trash files, thereby managing your phone’s storage. One such efficient application is Phone Cleaner. Install it now to augment your system’s performance. 

5. Move All The Files To An SD Card

If you want to know how to empty trash on android from a different aspect, this step is for you. Sometimes the internal memory of an Android falls short for several users. The best thing that you can do then is to purchase a Micro SD card.

We advise you to get your hand on an SD card of higher-end in terms of storage, preferably  128 GB or 256 GB. After that, you can store all your media, documents, files here and see enjoy the speed that your phone will regain.  

The Final Thoughts 

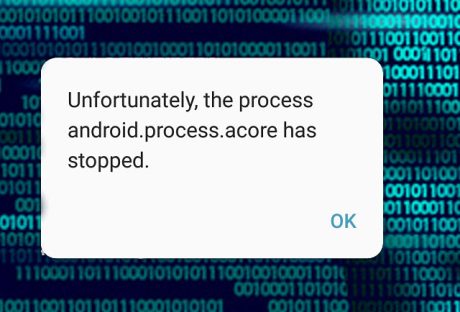
We often face storage issues, phone hanging issues, and many others, but we do not know its reason. What we do at first is blame the Android brand. But unfortunately, the main culprit is Trash Files or Junk Files. 

Consider cleaning your Android’s trash as a good habit and not as a task that you have to do. You can easily detect and clean junk files that you did not even know previously with these steps.

More Resources:

Leave a Reply

Your email address will not be published. Required fields are marked *

Related

how to fix a hacked Android phone

How To Fix A Hacked Android Phone

Are you an android user? Android seems to be one of the secure phone operating systems. But do you know even though the android has lots of security features the hacking is possible? Yes, the any-third party can easily enter your system and hack your phone data.Hence when you know how to fix a hacked Android phone, you do not have to take any messes regarding the third-party interventions on your private space.Let’s see the process of how to fix a hacked Android phone and block the third-party intervention. But before all, you have to know how you will know that your phone has been hacked? Then, when you are using the android phone, you will know that your phone has been hacked within a few security checks.How Do You Know That Your Phone Is Being Hacked?Android is one of the safest phone operating systems. Hacking android phone recovery is possible when you know that your phone has been hacked. And you can take further steps on how to fix the hacked android phone.When hackers are breaking into your system, the hackers have to install any malware in your android device to keep tracking your phone activities. The malware functions are going to interrupt your device’s regular activities.Here are some signs which are going to tell you that your phone is being hacked. And this is the first checking point before starting the process of how to fix a hacked Android phone.Poor phone speed and performance.Your phone is facing low signal strength.Phone apps are frequently crashing, and unknown apps are installed.Spam pop-ups.Sudden Increasing data usage.Changes in call settings in your android device are clear indications of hacking.If you are identifying these sudden changes in your phone, you can clearly say your phone has been hacked. After facing these problems, the android phone users are asking how my phone was hacked. How do I fix it? Here we are discussing the easiest four solutions for this problem.How To Fix A Hacked Android Phone?When you want to know how to fix a hacked Android phone, you have to start by identifying the problems. Then when you identify the problems, you can begin the process of how to unhack your phone. Before starting, take all the backups of your phone.Here are the solutions for the android device administrator hack.1. Clear The Cache MemoryClearing the cache memory is the first trial step for how to fix a hacked Android phone. When malware is installed in your system, your cache memory carries the sign of the installation. So first, open your android device in recovery mode. Then wipe out the cache portion of the memory. Choose the phone cache memory, then the device cache memory, and wipe out the whole cache memory from your device. Then restart your device again.2. Run The Antivirus Scan And Delete The Suspicious AppAndroid phone mobile antivirus systems are relatively stronger. First, when facing the low-speed problem, first look into the system’s other apps and run your antivirus scanning. The best way to block hackers is to keep your system updated and always scan your device. When you are stopping the auto-updating options, there is a chance of third-party interventions.First, open the Android settings. Then check all the apps. And if you are going to identify any apps which you can not remember to install. Then, identify and start the process of uninstalling it; after uninstalling the app restart your device once.3. Disable Call RedirectionsThis is another step of how to fix a hacked Android phone and find the hacker. When you are redirecting your calls to another number, the malware is going to track your activity. And after you are diverting any calls to the other number, the hacker will also do the same process.The hacker starts getting the other device’s information to their devices. After that, you can simply dial the USSD code from your device to know who is getting the information on the devices. This step is not only to fix your problem; you can find out who the hacker is.4. Factory Reset And Delete All The DataFactory resetting is the ultimate step you can take to fix the hacking problem. But before starting the factory resetting, it is better to take all the backups from your devices. Because after the factory reset, you will face a data loss problem, all of your data of the messages and contents and other information are going to be deleted.Every android phone has a factory reset option. Follow the following steps and delete all existing data from your devices.Step 1: First, start with opening the android phone settings options.Step 2: Then tap on the search icon of the settings option and type the factory reset command there. Press enter to run the command.Step 3: Open the resetting option and click on the erase all data options from there.When you are going to delete all the data from the devices and the malware, every other essential data will also be erased. So before doing the factory reset, always take the backups of the data. After doing the factory reset, your android phone is functioning as a new one.5. Enable Two Factor AuthenticationNowadays, there are many sites that offer two-factor authentication, and it can safeguard your android phone with ease. It can make your device safe and secure from the clutches of hackers. It is one of the best options to fix it within a shorter time frame.6. Enable Biometric AuthenticationBiometric authentication is one of the best ways to protect your phone from the clutches of hackers. It can make the life of hackers difficult if you enable biometric protection in your smartphone.Sometimes, the inbuilt security will enable your phone to offer biometric authentication and will enable you to keep your smartphone safer.7. Never Register On A Vulnerable WebsiteYou must not register through a vulnerable website that can tamper with the information present on your android phone. It can help you to achieve your objectives in an effective manner.8. Change The Passwords Of Your Online AccountsIf you think that your phone has been hacked, then you must ensure that all your online account passwords and user ids are changed. It can make your device less vulnerable to hackers within a shorter span of time.How To Protect Your Android Phone From Hackers?You can follow certain simple steps to protect your android phone from hackers. Some of these steps are as follows:-Make use of the Pin or the password in the lock screen.Lock all the required apps on your device.Try to download the apps from trusted sources.Read through the app permissions before you download any app.Download the device manager for android.The application of the Google authenticator is a must-have feature to consider.Frequently Asked Questions (FAQs):1. What Are The Symptoms Of A Hacked Android Phone? Some of the common symptoms of a hacked Android Phone are as follows:-1. You will find a random unwanted app install going on on your phone.2. Within a few seconds, you will experience poor battery life or extreme battery usage.3. You can view the weird pop-ups and ads.4. Unusual as well as high data usage.5. Your phone and apps will keep on crashing. 2. Will Factory Reset Stop A Hacker? With the help of the factory reset option, the majority of the malware can be removed from your phone. It can help your phone to stay away from the clutches of hackers. However, it can remove the photos, images, notes, and contact details from your device. 3. Can You Get Rid Of A Hacker Of Your Phone? If your phone is hacked, then you can clean your phone with the help of the factory reset option. It can fix your phone from the chances of damage within a shorter span of time. 4. Can A Hacker See You Through A Phone Camera? Yes! The hacker can see through your phone camera once he gets access to your phone. You have to stay vigilant in this regard to make use of these systems to make things work well in your way. 5. What Does *#21 Can Do To Your Phone? This code you can use to check whether your phone is being tapped False by the hacker or not. You have to identify these facts while using a hacked phone.Wrapping It Up!These are the most accessible four solutions of how to fix a hacked Android phone. Among these solutions, only the cache memory is clear, and the factory reset options are causing a data loss problem.If you currently do not want to face these problems, try simple solutions like reboot your system and the virus scanning.Hence, if the problem is not resolving, try the cache memory clear and the factory reset options. But recovery is possible within a few minutes. So what is your android using experiences? Do not forget to share your comments in the comment sections.More Resources:How To Fix android.process.acore Has Stopped Error?How To Fix Com.Android.Phone Has Stopped Error In Your Phone?How To Download Game Of Thrones Putlocker Online For Free?

READ MOREDetails
iPhone

Erase Photos form iPhone Without any Possibility of Recovery

iPhone is probably the best smartphone you can buy today. Along with its numerous features, this smartphone allows you to click some memorable photos. Whether you are a skilled photographer or not, click some spontaneous pictures and iPhone will make every photo look impressive. As an iPhone user, you may click numerous photos and soon you may run a shortage of memory. Now comes a difficult part and that is deleting the photos.Read more: How To Free Up Space On Your MacIt is not as difficult as rocket science to know how to delete photos from an iPhone, many people still face troubles. Here we are going to offer some easy ways of removing videos, photos, and albums quickly from iPhone. These methods are best for deleting pictures quickly. Method 1: Manually delete Photos From iPhone This method is applicable when you want to delete multiple photos from your iPhone. It is a superb way of removing only the unwanted pictures that acquire useful space and you do not need them anymore. This is how this method works.Unlock your phone and enter in the Camera Roll. Now open the album in which you want to delete some photos. Now tap and hold a picture that you want to delete. Now tap on all those pictures that you want to delete. Your phone will automatically select these pictures. Now spot the Trash icon given at the bottom-right corner of your iPhone’s screen. Tap on the trash icon and a confirmation window will pop-up. Confirm and delete all the selected photos.Method 2: Completely Erase Photos From iPhone by using SafeWiper This method is probably the most effective solution when you want to erase multiple photos before seeing them. SafeWiper is a renowned tool that allows iPhone users to erase phone data faster and permanently. You might probably know that erased photos still remain on your iPhone. These pictures cover the same storage as before. You might think that your phone’s memory is free of unwanted stuff, but that does not happen. The SafeWiper is a tool designed specially to remove the photos and other unwanted data permanently from the iPhone. Follow the given method and your phone will be free of trash items.Download SafeWiper tool for your iOS device. Install this tool on your PC. The installation process will automatically start once the tool is downloaded. Once the tool is installed, now connect your iPhone to the PC and wait until SafeWiper recognizes your device. This tool will offer several options such as Express Cleanup, Erase Private Data, Erase All Data, and Erase Deleted Files. Now click on the deleting option and SafeWiper will start analyzing the files on your Smartphone. This tool will quickly scan your device and provide the photos and other items ready to remove. Now select the items you want to delete and SafeWiper will permanently delete those items.  Method 3: Erase Photos from iPhone via iTunes This method is the best when it comes to removing pictures that simply refuse to leave the space from your phone. You might have often found some pictures that you simply cannot delete from your iPhone because you cannot find the trash icon. Your photos are probably synced with your computer via iTunes if you are facing such troubles. The way of deleting these pictures is quite easy. Follow the given steps. Connect the iPhone with your PC. Now open iTunes on your PC and then click on your device icon. You can easily spot the Photos folder after entering in your device. Now select the “Selected Albums” option and then deselect the photos and albums that you are trying to delete. Now click on Apply and your job is done.This trick will help you in finding and removing all the pictures you were unable to delete before. Conclusion: The third method is probably the most effective one because you can clean up your phone before anybody see your photographs. Moreover, the SafeWiper is what I think is a particularly fast eraser tool, you can completely erase text messages, photos, videos, contacts and other data from iPhone without any Possibility of recovery.Learn more from its site: https://www.safewiper.com/

READ MOREDetails

The Selfie Culture: Should we be worried?

Selfie trend is spreading everywhere in teenagers and teenagers. If you visit Facebook or Instagrams you can see many selfies posted by teens. It is very rare that you scroll on Facebook or any social media site, and you do not find any selfie posted by teenagers. Research shows that 91% of teenagers daily post their selfies on Facebook. Selfie has become a harmless habit of teens. Selfie is not dangerous in actual, but it could be harmful in many ways. Parents should ask their children to avoid this habit of always taking selfies. Inform them about the risks they can face. Selfies and Self-Esteem Many teenagers think that before the trend of selfies they were extremely camera-shy. But now they feel confident while taking selfies as well as in normal life they are confident, but this is just the thought of teens. In actual, the craze of taking selfies is a reason for the development of poor self-esteem. A survey has been made which shows that 65% of teenagers think that selfies are a way of increasing self-confidence, 40% of them believe that social media is a good way to share pictures with others in this way, they can show their beauty to others while 53% believe that if their photos are posted by someone else, it makes them feel bad.On the other hand, American plastic surgeons declared that more patients are visiting them for surgery because they think their face does not look good while taking selfies. They are not happy with their pictures on social media sites. There is a story of a UK teen which shows you how bad is selfie habit? He left the school and stayed at home for six months and spends 10 or more hours in selfie-taking. In the end, he attempted suicide due to over craze of a selfie. Now you can understand how selfies hurt teen’s self-esteem.Read More: App Development Benefits: Here’s Why You Should Go Mobile Selfies and Your Online Reputation As some activities on the internet or social media sites can be dangerous for your children and selfie is one of them. Teens post and share their selfies on Facebook or any social site with their friends. This can have a harmful impact on their reputation if their friends give bad comments on their selfies it may also hurt their relationships. Teens focus on online reputation more than the real world, if someone hurt their reputation they may get emotional and can take wrong steps. So, sharing selfie can be very harmful. Selfie Safety Tips: Parents should discuss with their children that too much enthusiasm for selfie-taking is not okay. Also, the comments of people on their pictures should not be related to their reputation. Make sure that your child is using all the security settings in their social accounts. Explain to them that they should take care of their personal things and do not share selfies with strangers or person to whom they cannot believe. Only post those selfies on social media on which they feel comfortable.Read More:Google Getting Into Phones – And It’s Changing The Mobile Internet Best IPhone Spy Apps Without Jail Breaking Top 5 Digital Wallet Apps For Android

READ MOREDetails